

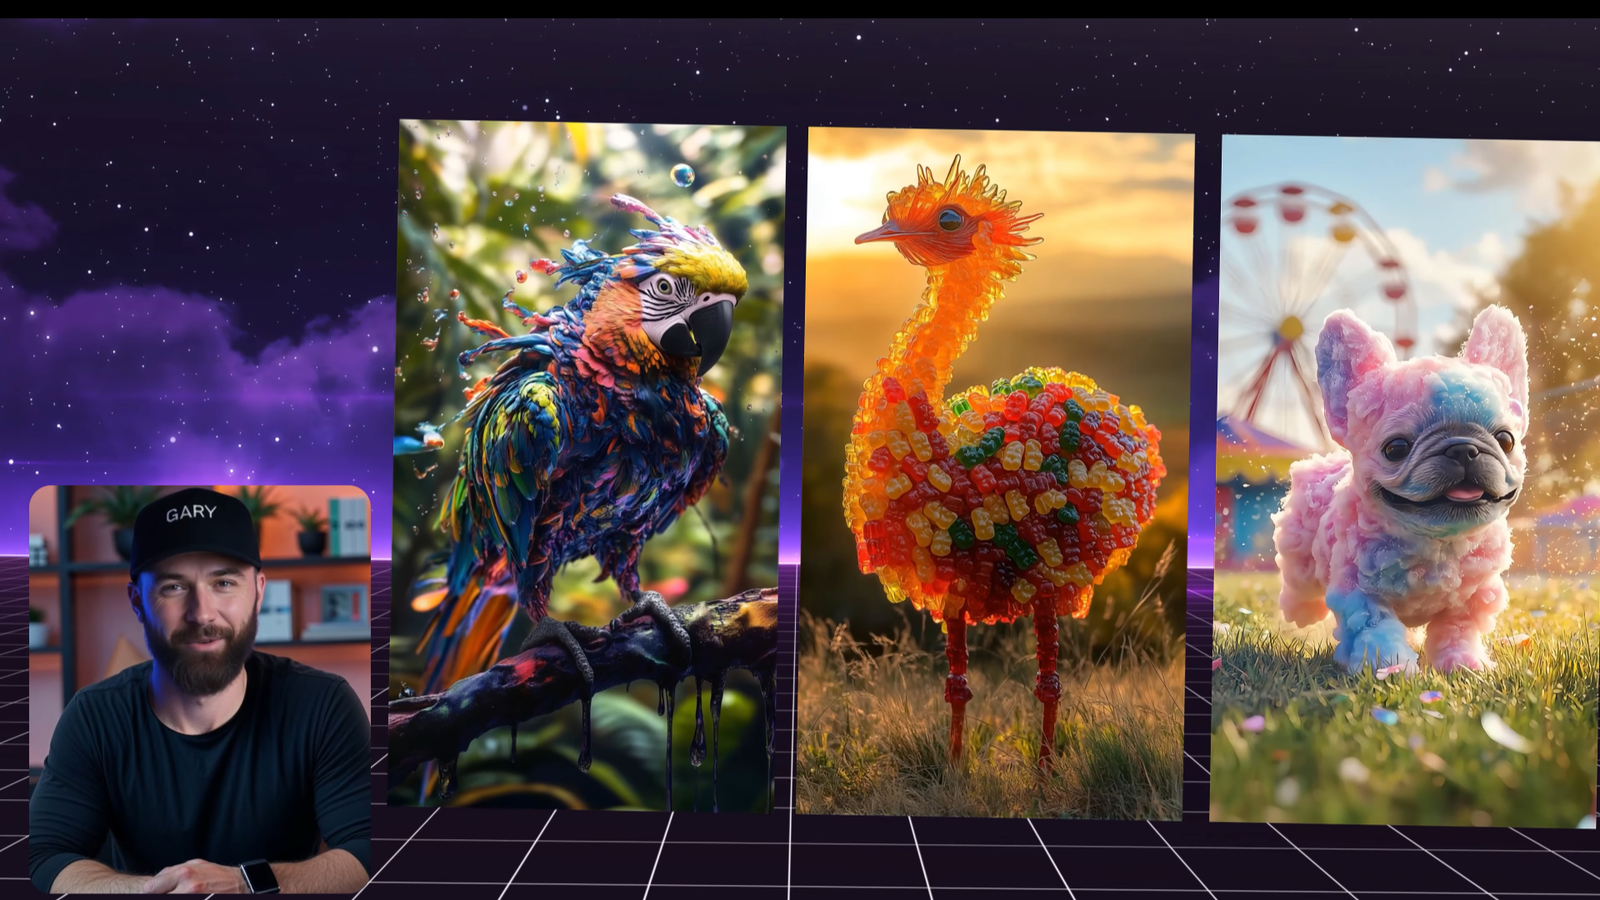
You’ve probably come across viral channels like Paw Print Productions, known for their eye-catching animal transformation videos that mix elements like candy, space, liquid fire, and gems. These mesmerizing clips are racking up millions of views—and today, I’m going to show you exactly how to create your own.
Hi, I’m Gary, a content creator and AI video expert. Whether you’re creating content for YouTube, TikTok, or Instagram, this guide will walk you through how to make highly engaging AI-generated transformation videos. If you have a unique idea and want to know how to bring it to life, drop a comment and I’ll help you out!
Step 1: Crafting the Perfect Prompt with ChatGPT
The most important part of creating stunning AI visuals is writing the right prompt.
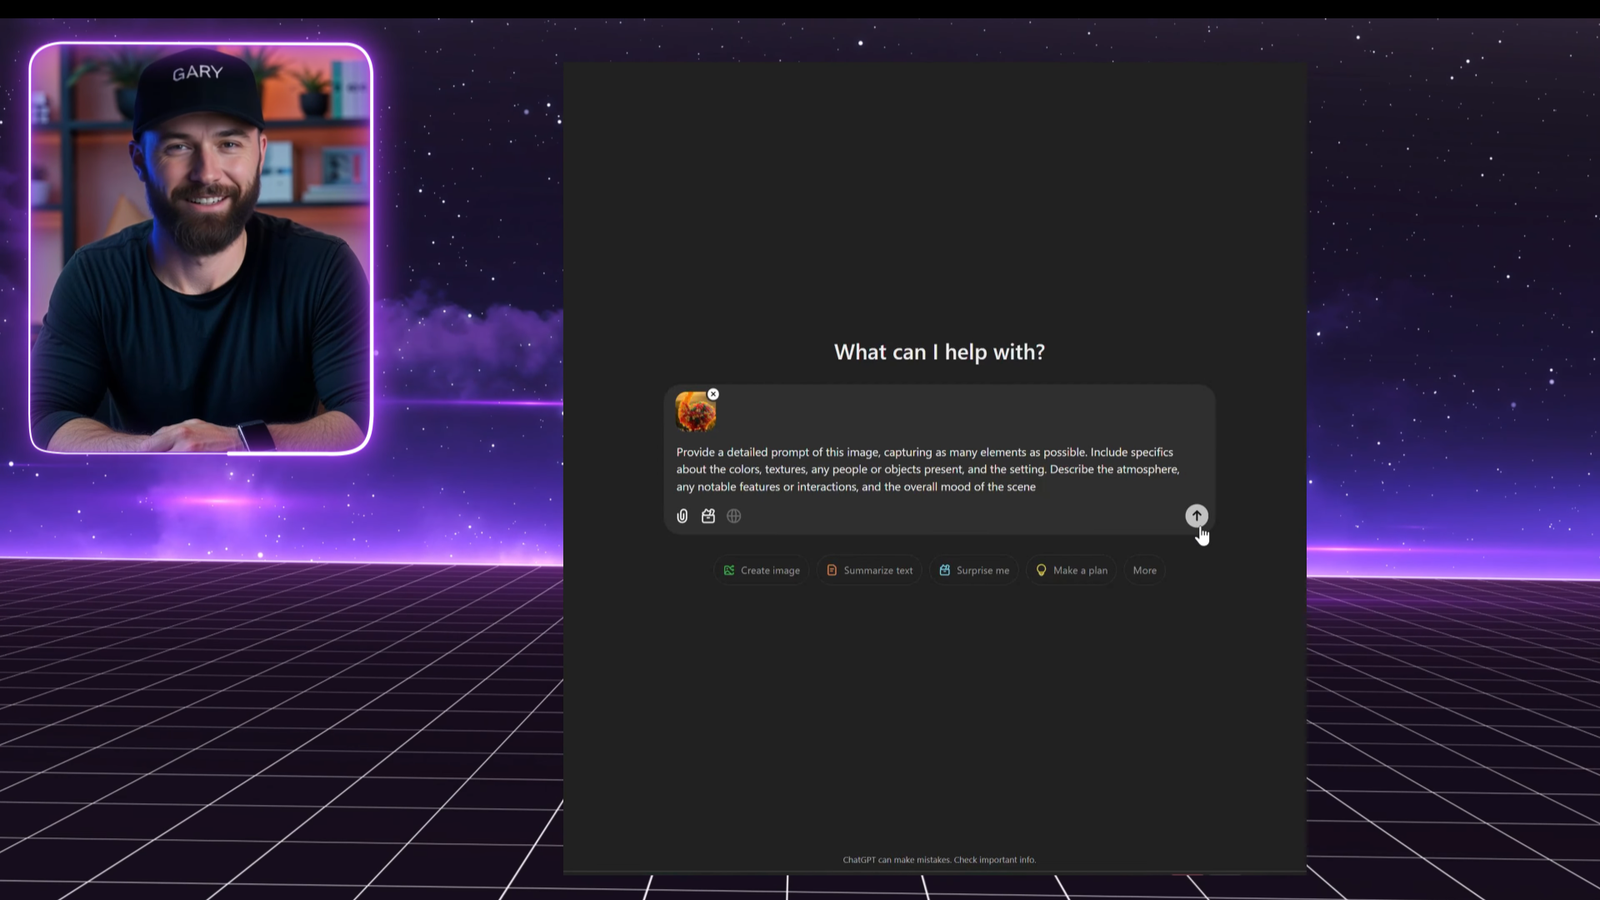
Start by picking an image from a transformation video that inspires you. Then, use ChatGPT to break it down. Type this:
“Provide a detailed description of this image, capturing as many elements as possible. Include specifics about the colors, textures, any people or animals, objects present, the background setting, and the overall mood of the scene.”
ChatGPT will generate a detailed prompt based on the image. It may not be 100% accurate, but it’s a great starting point.

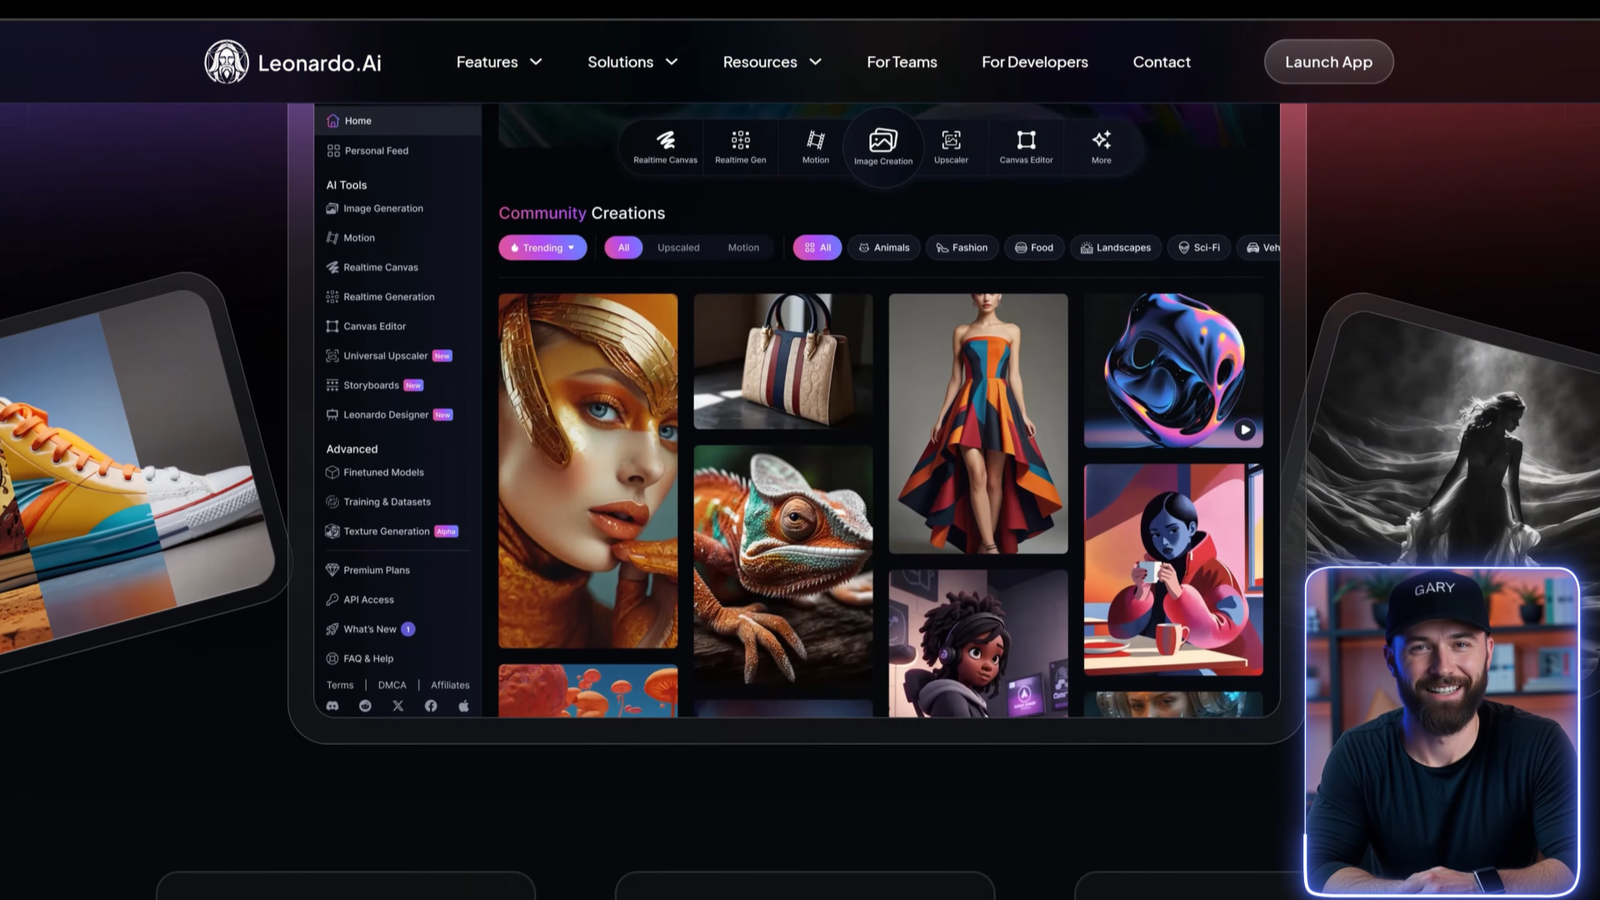
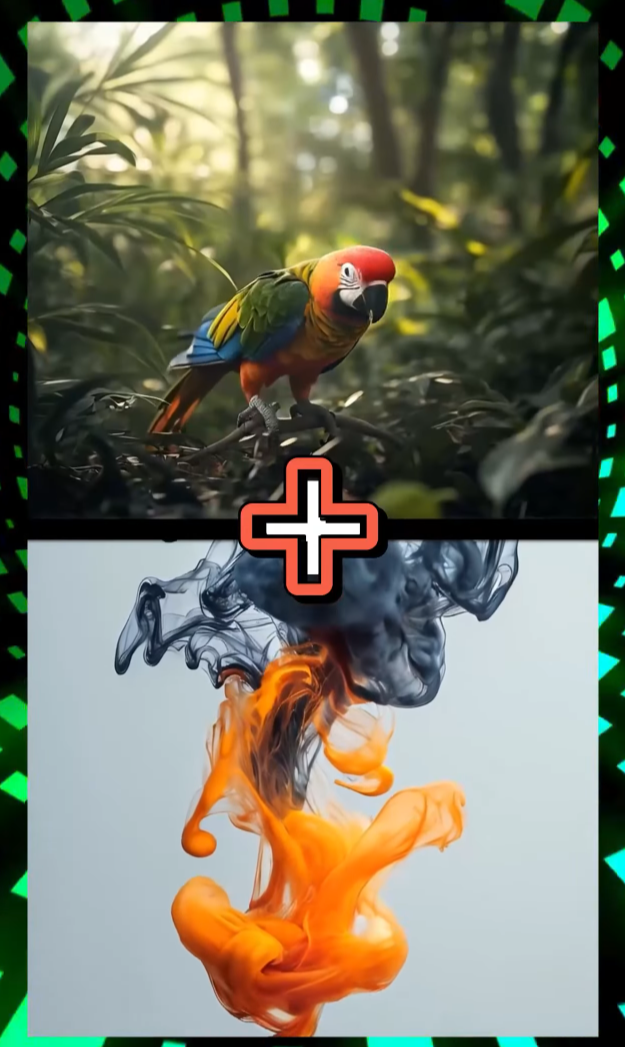
Step 2: Generating Images Using Leonardo AI
Once you have your prompt, head over to Leonardo AI—one of the most powerful and user-friendly text-to-image tools available today.
- Paste the prompt into the prompt box.
- Select the Phoenix 1.0 model.
- Keep default settings for prompt enhance, style, and contrast.
- Choose Ultra for generation mode.
- Set the image size to 9×16 (perfect for mobile-friendly vertical videos).
- Generate 4 images to give yourself multiple options.
If you want even better results, try Image-to-Image in Leonardo:
- Upload the generated image.
- Set the strength to around 0.3 to maintain similarity.
- Re-generate for improved accuracy and consistency.
Repeat this process for each image you want in your video.

Step 3: Turning Images into Video Using Kling AI
Once your images are ready, it’s time to animate them with Kling AI (version 1.6). This tool allows you to create ultra-smooth, professional-looking animations from still images.
Here’s how:
- Select AI Videos and choose Kling AI version 1.6.
- Upload your image.
- Leave the prompt blank for your first try.
- Set creativity to 0.5 (higher values make it follow the prompt more closely).
- Choose Professional Mode and set the duration to 5 seconds.
- Hit Generate and review the result.
Want to make it even more dynamic? Use specific animation prompts like:
- “The lens rotates capturing dynamic angles.”
- “The dog runs toward the viewer as the camera slowly pulls back.”
- “Animate the bird’s colors to cascade like water droplets in slow motion.”
These will help add life and cinematic motion to your scenes.


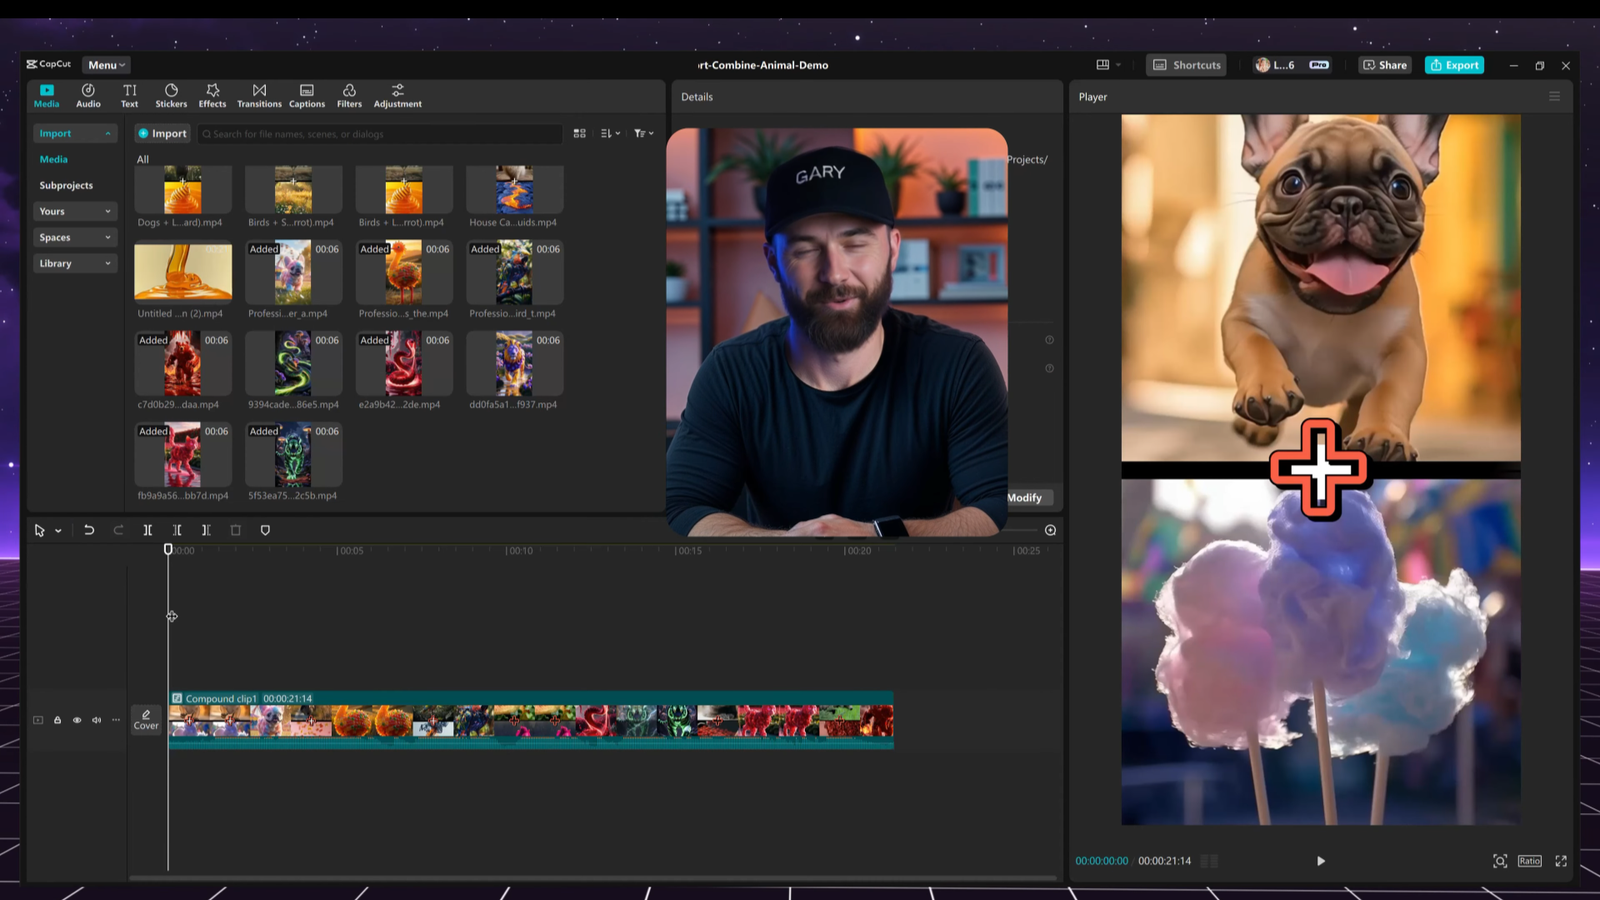
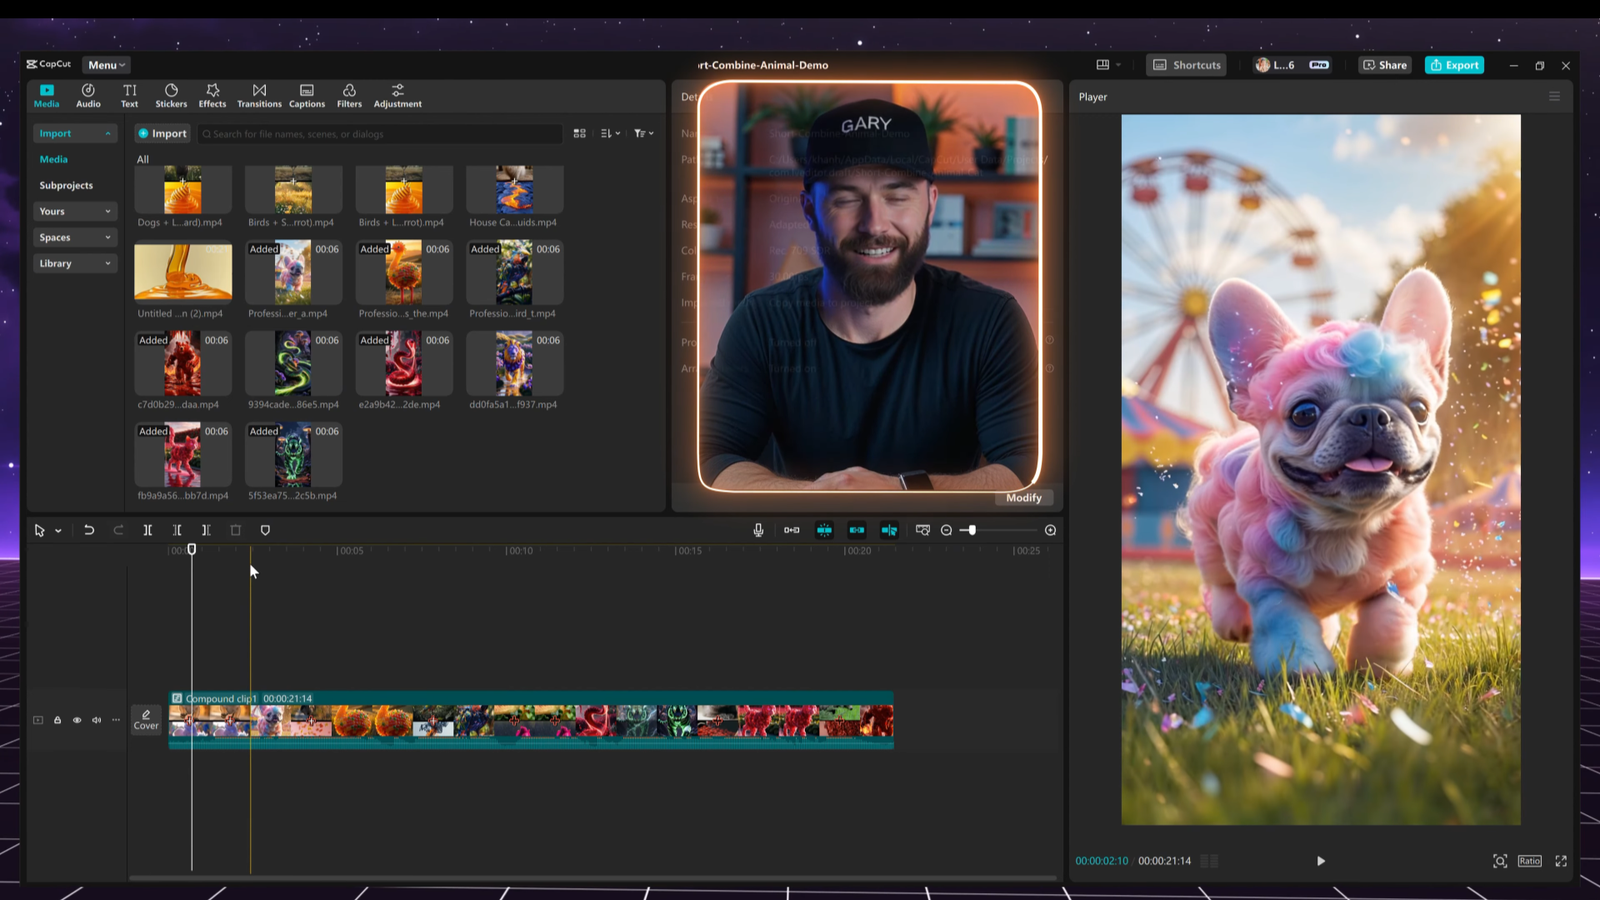
Step 4: Final Edits in CapCut
Once your animated clips are ready, it’s time to assemble them in CapCut—a free, beginner-friendly video editing tool.
Import:
- All clips from Kling AI
- Sound effects
- Background music
- Voiceovers or narration
Arrange your clips to match the rhythm and emotion of your audio. Add smooth transitions, minor effects, and adjust colors if necessary. You don’t need to go overboard—the key is keeping your story engaging from start to finish.
Final Thoughts
And that’s it! You now have a complete, high-retention animal transformation video that’s ready to go viral. These types of videos consistently achieve 90%+ retention rates, which is a huge deal for YouTube Shorts and TikTok’s algorithm.

If you found this tutorial helpful, don’t forget to like, subscribe, and turn on notifications for more AI video-making tips.
Let’s continue creating viral content together—see you in the next video!
Leave a Reply